Checkerboard Cake
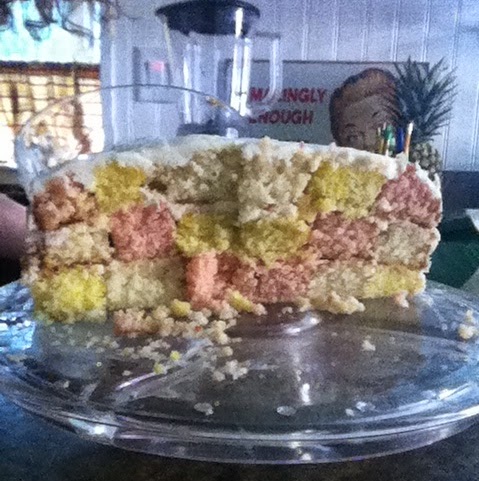
This is a largely Pinterest inspired project. I am fairly inclined to call this at least a semi-Pinterest fail. I hesitate to call it a full Pinterest fail because it was super delicious and you can tell that it's three different cakes. But I'm still glad I did it because it was indeed a learning experience. So I choose lemon, strawberry and coconut, which are nice summery flavors. But I actually used them because I have random bottles of lemon, strawberry and coconut extracts in my cabinet. Honestly, it was cabinet clean out day.
Lemon Strawberry Coconut Checkerboard Cake
Directions
I used two recipes which I've already blogged out- the ultimate vanilla cake and my standard vanilla buttercream, which can be found here. Make double batch of the batter, and separated it into three bowls, with around 2¼ cups in each. Then I add 1 tablespoon of each extract. Let the coconut one be, then put yellow food coloring into the lemon batter and red into the strawberry. Don't be stingy on the food coloring.
Side note: I wish I had made the colors more vibrant so the checkers stood out better. I also wish that I had just used an entirely different recipe. As yummy as the cake is, it's way too crumbly. When I was trying to put move the pieces around most of them just broke. Plus when I was trying to frost it the crumbs all just came up. Even did the crumb coat. Still crumbs. Just a mess. I found it very stressful. I wish I had baked something sturdier.
Bake them in 9 inch round pans with parchment paper on the bottom and cooking spray on the sides. Once they're done, let them cool fully. If they're still warm, they'll certainly crumble worse. So after they're cool, flip them out onto plates. I found two bowls which were 3 and 6 inches in diameter, hopefully you have such bowls as well. Use them to cut concentric circles into the cake. For this part I found it easiest to just cover my counter in parchment paper. Just mix and match the pieces all up so there's one ring of each flavor in the layer. Spread some frosting on top of the bottom layer, then add the next layer, more frosting, layer, more frosting all around the cake. Let that harden, then frost it some more. All done!

Reviews
This cake was honestly delish. I'll probably eat a slice after I finish writing this. I wasn't allowed to bring any dessert to Fathers' Day dinner, and I'm also not allowed to bring cake to Kevin anymore, so I brought it to work. I really appreciate my coworkers because they always eat what I make. They're great. My manager Amy texted me "Hey...u need to go to culinary school...cake is delicious!" Her texts are great. Also, manager Tom asked me to drop out of college so I can work at Penney's and bake for them forever. (Answer: no) Various other coworkers told me "great cake."


Comments
Post a Comment